How To Add Authentication & Secure HarperDB APIs Using SuperTokens in Your React App

Developer, Mentor, Writer. Blog: https://www.devtoolsacademy.com/
Adding authorization & authentication to an app is a common task for developers.
When you're launching a new product, a startup, or a side project, it can feel like a mission.
This tutorial will teach us how to make a music player app that uses SuperTokens for authentication and HarperDB for the backend.
Some of the app's most essential features
On Backend Side:
- Secure your API with almost significantly less and zero configurations.
- Secure your third-party API on the server side using SuperTokens.
- Session management is simple.
On the Front-end side:
For login, use SuperTokens' library component, which is available as an npm package.
There's no need to develop any extra code for authentication.
There's no need to maintain tokens on the UI side.
You won't have to worry about managing token refresh calls on the UI side because SuperTokens will take care of it for you.
TL;DR
Here are the links to get to the source code or learn more about both products faster
What you'll discover
- How to add authentication using SuperTokens.
- How to secure 3rd party (HarperDB) endpoints.
Let's talk about SuperTokens
- SuperTokens is an open-source authentication.
- They help you launch quickly so that you can focus on your core product offering.
- SuperTokens is 100% open source.
- Developers can own and manage their user's data.
- SuperTokens can be run on your premise for free and also has a generously hosted tier for those who don't want to manage it themselves.
SuperTokens is a versatile authentication and authorization solution for your applications.
Prerequisites
This tutorial assumes the reader has the following:
Node installed on their local development machine.
You can verify if you do by running the command below in your terminal.
node -v
If otherwise, download from here
A basic knowledge of HTML, CSS, JavaScript, and React
Take a peek at how we developed our React app and used SuperTokens to authenticate it.
A summary of the project's setup
Yay! This section will create a React music player app and incorporate SuperTokens and HarperDB.
Alternatively, you can utilize the start directory as your project root by cloning the GitHub repository. It includes the whole project setup that will get you started.
How to Begin Using SuperTokens
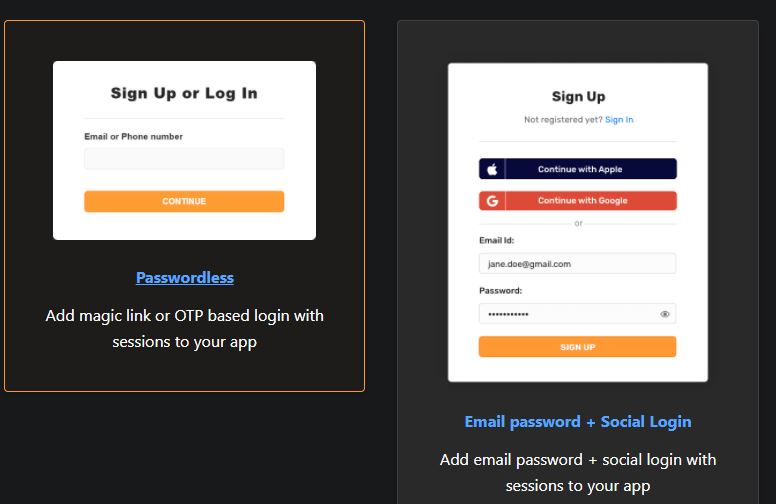
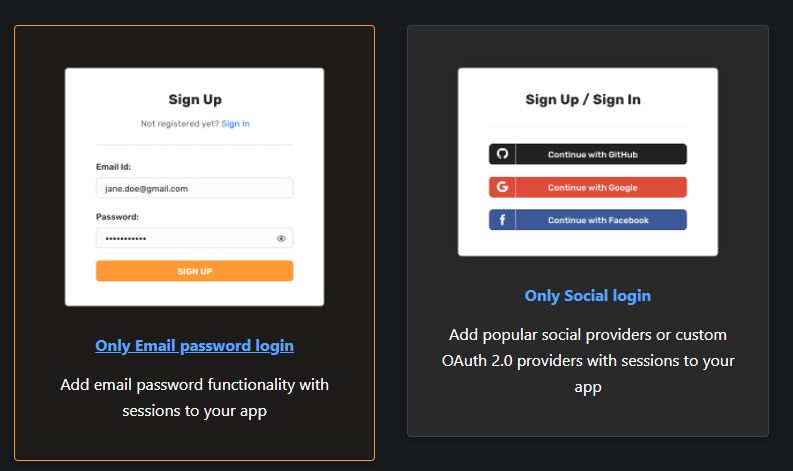
SuperTokens provides a variety of ready-to-use recipes from which to choose.
You can see all the recipes. here
We'll use the pre-built EmailPassword Recipe to access the demo app, which will look something like this. ⬇
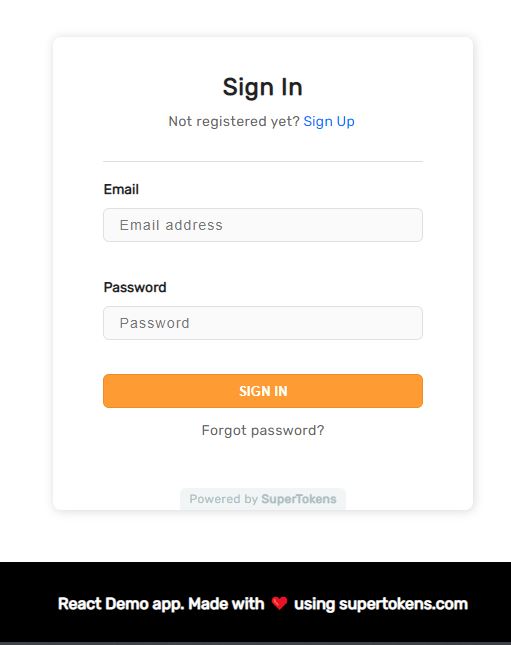
The supertokens website has the documentation for this recipe. click here
Now, fork the GitHub repository
Let's have a look at all of the project dependencies that were used to make this app
Dependencies used:

"dependencies": {
        "axios": "^0.21.0",
        "body-parser": "^1.19.0",
        "cors": "^2.8.5",
        "express": "^4.17.1",
        "helmet": "^4.6.0",
        "morgan": "^1.10.0",
        "mysql": "^2.18.1",
        "npm-run-all": "^4.1.5",
        "react": "^17.0.1",
        "react-dom": "^17.0.1",
        "react-router-dom": "^5.2.0",
        "react-scripts": "4.0.0",
        "supertokens-auth-react": "^0.17.0",
        "supertokens-node": "^8.0.0",
        "web-vitals": "^0.2.4"
    },
    "devDependencies": {
        "@testing-library/jest-dom": "^5.12.0",
        "@testing-library/react": "^11.1.0",
        "@testing-library/user-event": "^12.6.2",
        "nodemon": "^2.0.12"
    },
Using the SuperTokens npm package in a React application
The following use cases are demonstrated in this demo app.
- Login
- Sign up
- Logout
- Forgot password flow
- Session management & Calling APIs
You can now install the project dependencies with npm:
npm install
Now it's time to put this demo app to work.
npm run dev
The example app will run on (http://localhost:3000), while the API server will run on (http://localhost:3001).
On the frontend, authentication
We use the supertokens-auth-react package on the front end to handle authentication (sending and receiving tokens).
The Session is initialized in the app.js file:
SuperTokens.init({
    appInfo: {
        appName: "Music Player", // TODO: Your app name
        apiDomain: getApiDomain(), // TODO: Change to your app's API domain
        websiteDomain: getWebsiteDomain(), // TODO: Change to your app's website domain
    },
    recipeList: [
        EmailPassword.init({
            emailVerificationFeature: {
                mode: "REQUIRED",
            },
        }),
        Session.init(),
    ],
});
To deliver the token to the server in an API request, we must include the following line.
Session.addAxiosInterceptors(axios);
The Supertokens-auth-react package will handle storing tokens on the client, transmitting tokens to the server, and updating tokens before they expire.
Let's discuss the react component that we used to create the music player app
In Visual Studio Code, the folder structure appears like this:
1- Music Container (MusicContainer.jsx)
We manage all of the state-related stuff in this component and render all of the child components.
Here, we call the songs endpoint exposed by API server.js to get the list of songs.
import React, { useCallback, useState } from "react";
import SongList from "./SongList.jsx/SongList";
import Player from "./Player/Player";
import SongDetail from "./SongDetails/SongDetails";
import axios from "axios";
import { getApiDomain } from "../utils/utils";
import useAsync from "../Hooks/useAsync";

export default function MusicContainer() {
    const asyncCallback = useCallback(() => {
        return axios.get(`${getApiDomain()}/songs`);
    }, []);
    const { data } = useAsync(asyncCallback);
    const songs = data || [];
    const [selectedSong, setSelectedSong] = useState(0);

    return (
        <>
            <SongDetail selectedSongId={selectedSong} songs={songs} />
            <SongList selectedSong={selectedSong} songs={songs} selectedSongId={(id) => setSelectedSong(id)} />
            {songs.length > 0 && (
                <Player songs={songs} selectedSongId={selectedSong} selectSongById={(id) => setSelectedSong(id)} />
            )}
        </>
    );
}
2- Song List (SongList.jsx)
All of the songs are rendered in this component.
And the player component will play each of the songs in the panel when you click on them in the panel.
import React from 'react'
import './SongList.css'
import logo from '../../playing.gif'

export default function SongList({songs, selectedSongId, selectedSong}) {
  return (
    <>
      <div className="header">
        <div className="track-number">#</div>
        <div className="track-title">Title</div>
        <div className="track-author">Author</div>
      </div>

      <div className="song-main">
        {' '}
        {songs.map((item, index) => (
          <div
            key={index}
            className={`song-list ${index === selectedSong ? 'active' : ''}`}
            onClick={() => selectedSongId(index)}
          >
            {index !== selectedSong ? (
              <div className="track-number">{index + 1}</div>
            ) : (
              <div className="index">
                <img alt="" src={logo} id="focused" className="small-icon" />
              </div>
            )}
            <div className="track-title">{item.name}</div>
            <div className="track-author">{item.author}</div>
          </div>
        ))}
      </div>
    </>
  )
}
3. Player (Player.jsx)
The HTML5 audio element is used in this player component to play all of the songs in the app.
import "./Player.css";
import { useCallback, useEffect, useRef, useState } from "react";
import { forwardsSvg, backwardsSvg, shuffleSvg } from "../svg";
import Progress from "../ProgressBar/ProgressBar";
import SongTime from "./SongTime";

export default function Player({ selectedSongId, songs, selectSongById }) {
    const [shuffled, setShuffled] = useState(false);
    const [currentTime, setCurrenTime] = useState(0);
    const [duration, setDuration] = useState(0);
    const [currentVolume, setCurrentVolume] = useState(100);
    const [playerState, setPlayerState] = useState(false);
    const audioRef = useRef();
    let intervalRef = useRef();
    let clicked = useRef(false);

    const spaceDownFunc = useCallback((event) => {
        if (event.keyCode === 32 && !clicked.current) {
            clicked.current = true;
            document.getElementsByClassName("main-control")[0].click();
        }
    }, []);
    const spaceUpFunc = useCallback((event) => {
        if (event.keyCode === 32 && clicked.current) {
            clicked.current = false;
        }
    }, []);

    useEffect(() => {
        document.addEventListener("keydown", spaceDownFunc);
        document.addEventListener("keyup", spaceUpFunc);
        return () => {
            clearInterval(intervalRef.current);
            document.removeEventListener("keydown", spaceDownFunc);
            document.removeEventListener("keyup", spaceUpFunc);
        };
    }, [spaceDownFunc, spaceUpFunc]);

    if (selectedSongId < 0 || selectedSongId > songs.length - 1) {
        selectSongById(0);
    }

    useEffect(() => {
        if (audioRef.current) {
            audioRef.current.volume = currentVolume / 500;
        }
    }, [currentVolume]);

    const onMusicPlay = (e) => {
        e.preventDefault();
        setPlayerState((prev) => !prev);
    };

    const onBackwardClick = () => {
        if (selectedSongId > 0) {
            selectSongById(selectedSongId - 1);
        }
    };
    const onForwardClick = () => {
        if (selectedSongId < songs.length - 1) {
            selectSongById(selectedSongId + 1);
        }
    };

    useEffect(() => {
        setPlayerState(true);
    }, [selectedSongId]);

    useEffect(() => {
        if (playerState) {
            audioRef.current.play();
        } else {
            audioRef.current.pause();
        }
    }, [playerState, selectedSongId]);

    return (
        <div id="player">
            <SongTime currentLocation={currentTime} duration={duration} />
            <div
                className="control"
                id={shuffled ? `active` : null}
                onClick={() => {
                    setShuffled(!shuffled);
                }}>
                {shuffleSvg}
            </div>
            <div className="control" onClick={onBackwardClick}>
                {backwardsSvg}
            </div>
            <div className="main-control control" onClick={onMusicPlay}>
                <i className={`fas fa-${playerState ? "pause" : "play"}-circle`}></i>
            </div>
            <div className="control" onClick={onForwardClick}>
                {forwardsSvg}
            </div>
            <Progress value={currentVolume} setVolume={(vol) => setCurrentVolume(vol)} />

            <audio
                id="main-track"
                controls
                src={songs[selectedSongId].url}
                preload="true"
                onEnded={() => {
                    selectSongById(shuffled ? Math.round(Math.random() * songs.length) : selectedSongId + 1);
                }}
                onLoadedMetadata={() => {
                    setDuration(audioRef.current.duration);
                    intervalRef.current = setInterval(() => {
                        if (audioRef.current) {
                            setCurrenTime(audioRef.current.currentTime);
                        } else {
                            clearInterval(intervalRef.current);
                        }
                    }, 1000);
                }}
                ref={audioRef}
                hidden>
                Your browser does not support the
                <code>audio</code> element.
            </audio>
        </div>
    );
}
4- Progress (Progress.jsx)
The progress bar component is used to show the song's progress.
import React from "react";
import "./ProgressBar.css";

export default class ProgressBar extends React.Component {
    constructor(props) {
        super(props);
        this.state = { showTooltip: false };
    }
    render() {
        return (
            <div className="progress">
                <input
                    type="range"
                    min="0"
                    max="100"
                    className="slider"
                    value={this.props.volume}
                    onChange={(e) => this.props.setVolume(e.target.value)}
                    onMouseEnter={() => this.setState({ showTooltip: true })}
                    onMouseLeave={() => this.setState({ showTooltip: false })}
                />
                {this.state.showTooltip && <span className="tooltip">{this.props.volume}</span>}
            </div>
        );
    }
}
5- Song Detail (SongDetail.jsx)
The track title and album thumbnail image are displayed in this component.
import React from 'react'
import './SongList.css'
import logo from '../../playing.gif'

export default function SongList({songs, selectedSongId, selectedSong}) {
  return (
    <>
      <div className="header">
        <div className="track-number">#</div>
        <div className="track-title">Title</div>
        <div className="track-author">Author</div>
      </div>

      <div className="song-main">
        {' '}
        {songs.map((item, index) => (
          <div
            key={index}
            className={`song-list ${index === selectedSong ? 'active' : ''}`}
            onClick={() => selectedSongId(index)}
          >
            {index !== selectedSong ? (
              <div className="track-number">{index + 1}</div>
            ) : (
              <div className="index">
                <img alt="" src={logo} id="focused" className="small-icon" />
              </div>
            )}
            <div className="track-title">{item.name}</div>
            <div className="track-author">{item.author}</div>
          </div>
        ))}
      </div>
    </>
  )
}
Securing 3rd party APIs
We're using an API server to use the Super tokens backend package for token management and session management.
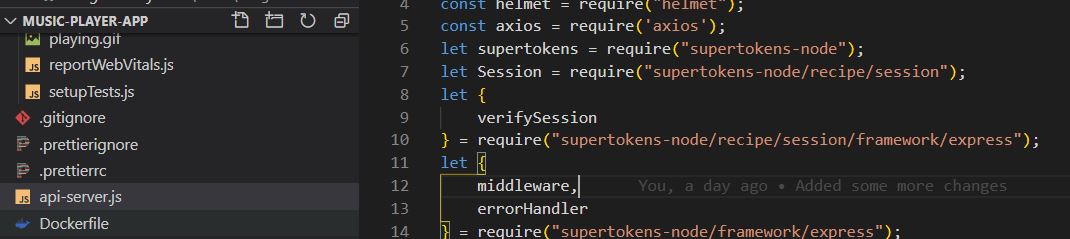
let supertokens = require("supertokens-node");
let Session = require("supertokens-node/recipe/session");
The supertokens node package must first be initialized:
supertokens.init({
    framework: "express",
    supertokens: {
        // TODO: This is a core hosted for demo purposes. You can use this, but make sure to change it to your core instance URI eventually.
        connectionURI: "https://try.supertokens.io",
        apiKey: "<REQUIRED FOR MANAGED SERVICE, ELSE YOU CAN REMOVE THIS FIELD>",
    },
    appInfo: {
        appName: "SuperTokens Demo App", // TODO: Your app name
        apiDomain, // TODO: Change to your app's API domain
        websiteDomain, // TODO: Change to your app's website domain
    },
    recipeList: [EmailPassword.init(
        {
                override: {
                apis: (originalImplementation) => {
                    return {
                        ...originalImplementation,

                        signInPOST: async ({formFields, options}) => {
                                     let email = formFields.filter((f) => f.id === "email")[0].value;
                            let password = formFields.filter((f) => f.id === "password")[0].value;


                            // const res = await query(`select * from user where email='${email}'`)
                            if(userId[email]) {
                            let sessionHandles = await Session.getAllSessionHandlesForUser(userId[email]);
                            if(sessionHandles.length > 0) {
                                return {
                                    status: 'SESSION_ALREADY_EXISTS'
                                }
                            }
                        }
                            let response = await options.recipeImplementation.signIn({ email, password });
                            if (response.status === "WRONG_CREDENTIALS_ERROR") {
                                return response;
                            }
                            let user = response.user;
                            userId[email] = user.id;

                            await Session.createNewSession(options.res, user.id, {}, {});
                            // query(`insert into user (email, status) values ('${email}', 'ACTIVE')`)
                            return {
                                status: "OK",
                                user,
                            };
                        },

                    }
                },
            }
    }
    ), Session.init(),

    ],
});
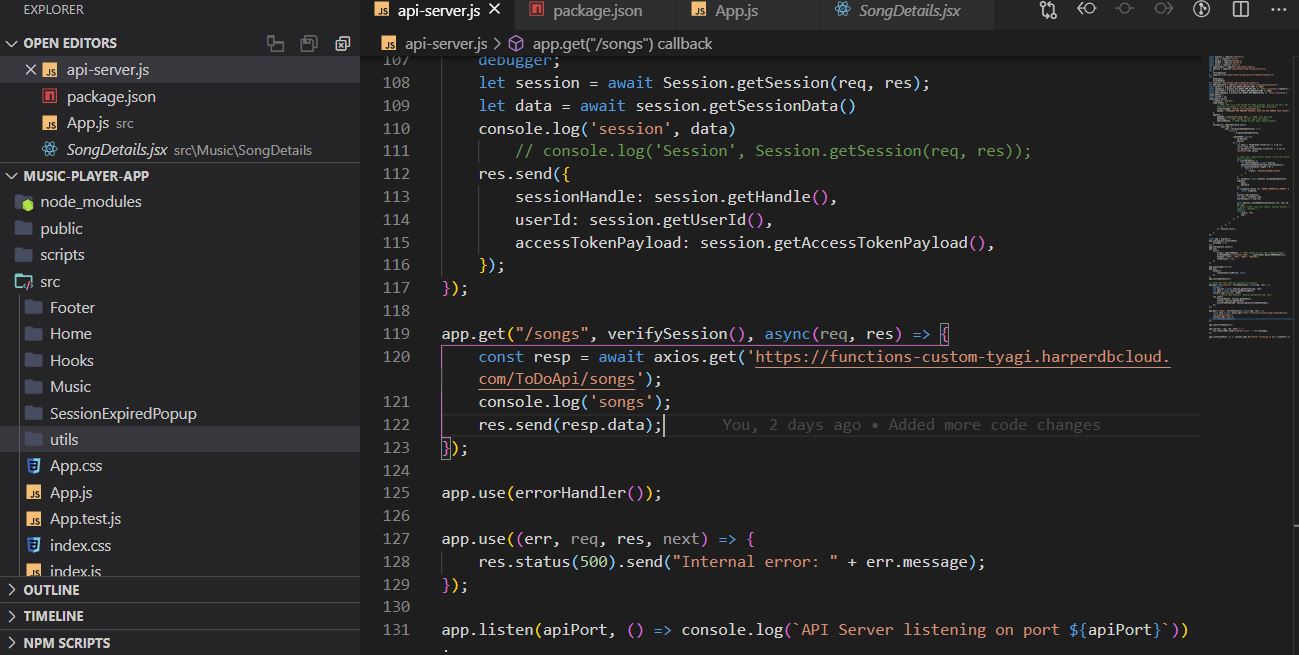
We exposed the Song endpoint to the react app to retrieve the music list.
We're calling the HarperDB endpoint in this endpoint to receive a list of songs from DB.
app.get("/songs", verifySession(), async (req, res) => {
    const resp = await axios.get('https://functions-custom-tyagi.harperdbcloud.com/ToDoApi/songs');
    res.send(resp.data);
});
As a result, the get method's second parameter, verifySession, does the validation(token, Session) for us.
The super tokens make this method available.
SuperTokens takes charge of token creation and session management when the user logs into the demo app.
That was it for this blog.
Today, I hope you learned something new, and if you did, please like and share it so that others can see it as well.
Thank you for being a regular reader; you're a significant reason I've been able to share my life/work experiences with you.
For the most up-to-date information, follow SuperTokens on Twitter.
Follow me on Twitter at TheAnkurTyagi.
If you want to understand more about SuperTokens, I recommend reading last year's blog article. ⬇
Everything about super tokens - an open-source alternative to Auth0, Firebase Auth, and AWS Cognito.


