Table of contents
- Introduction
- What is Medusa?
- Medusa is made up of three parts
- 1- A Headless Backend
- 2- An Admin Dashboard
- 3- A Storefront
- Why Medusa is Beneficial for a Variety of Reasons
- The New Commercial Era is the Headless Platform
- Getting Started with "create-medusa-app" command
- How to Create a Medusa Project
- How to Implement Different Medusa Functionality
- How to Use Different Medusa Integrations
- Shopify OR Medusa
- Why Should You Use Medusa?
Introduction
Medusa is an open-source Shopify alternative that enables users to quickly construct a virtual commerce store.
Its extensible architecture allows clients to adapt their engines to match their needs without spending money on maintenance.
Medusa provides extensive assistance to its customers during their e-commerce journey. The software includes a full online store with collections, category pages, client identification, payment flow, and more.
Furthermore, it provides a fundamental blueprint for users to begin constructing extraordinary digital commerce experiences. Medusa Express also allows clients to buy and sell things immediately through a URL link.
What is Medusa?
Medusa is a NodeJs-based and open-source e-commerce platform that enables developers to build their own configurable and extendable online store.
Medusa aims to give developers a wonderful experience when designing unique e-commerce stores.
It is a free and open-source Shopify alternative.
You can create immersive digital commerce experiences by setting up Medusa with a single command.
Additionally, thanks to Medusa's abstract architecture, developers may easily modify and extend the platform to suit their needs.
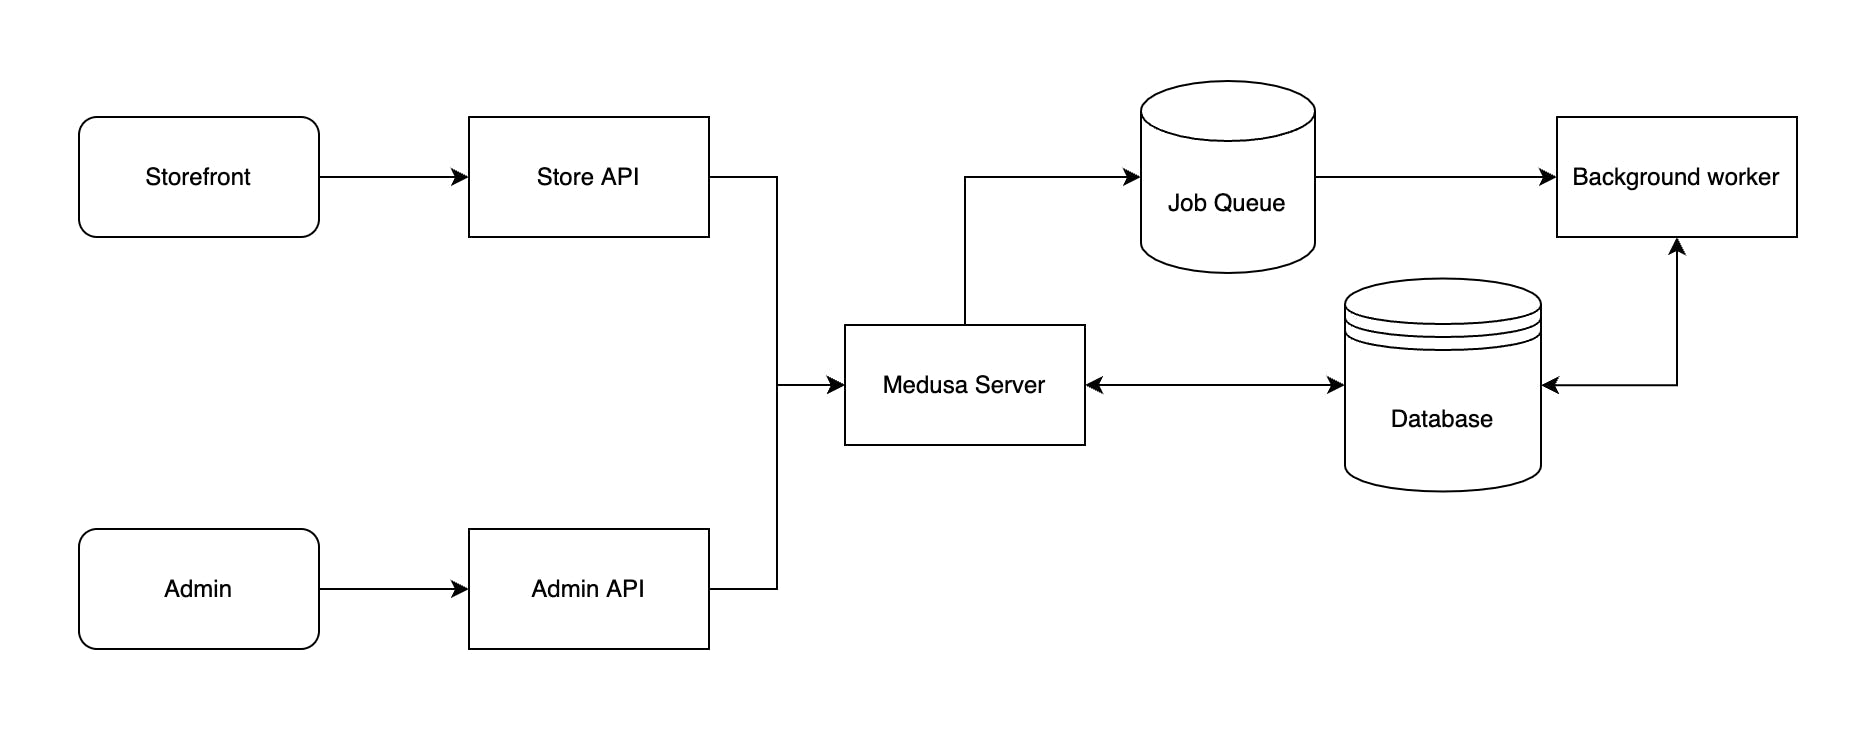
Medusa is made up of three parts
1- A Headless Backend
This is the major component that contains all of the store's logic and data. Through REST APIs, your admin dashboard and storefront communicate with the backend to retrieve, generate, and modify data.
Your Medusa server will feature all checkout workflow functionality for your store. Cart management, shipping and payment providers, user administration, and other features are included. It also lets you customize your store's region, tax restrictions, discounts, gift cards, and other features.
2- An Admin Dashboard
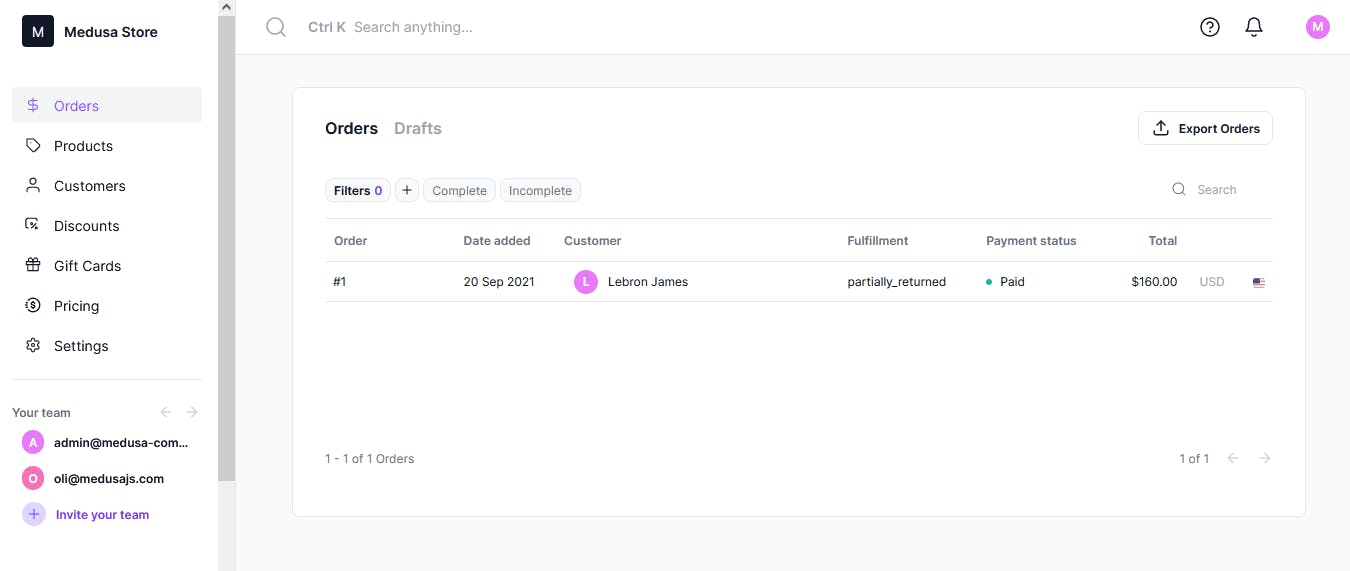
Store managers can access the admin dashboard. The admin dashboard allows store owners to see, generate, and amend data such as orders and products.
Medusa comes with a gorgeous admin dashboard that you can utilize right away. Medusa's admin panel has several features for managing your stores, such as order management, product management, user administration, and more.
You can also use the Admin REST APIs to develop your admin dashboard.
3- A Storefront
Customers utilize the Storefront to browse products and place orders.
Medusa provides two stores:
Next.js Store
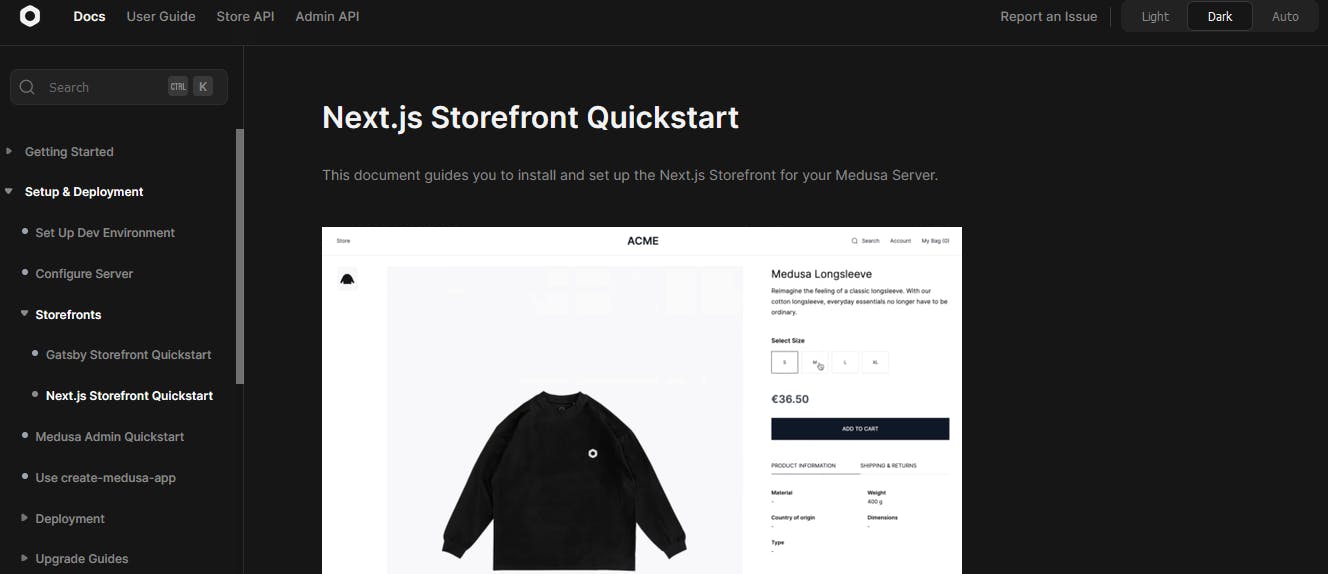
This document will walk you through installing and configuring the Next.js Storefront for your Medusa Server Instead of manually following the installation guide and then deploying the Next.js Storefront, you can use this link to deploy it to Netlify.
Gatsby Store
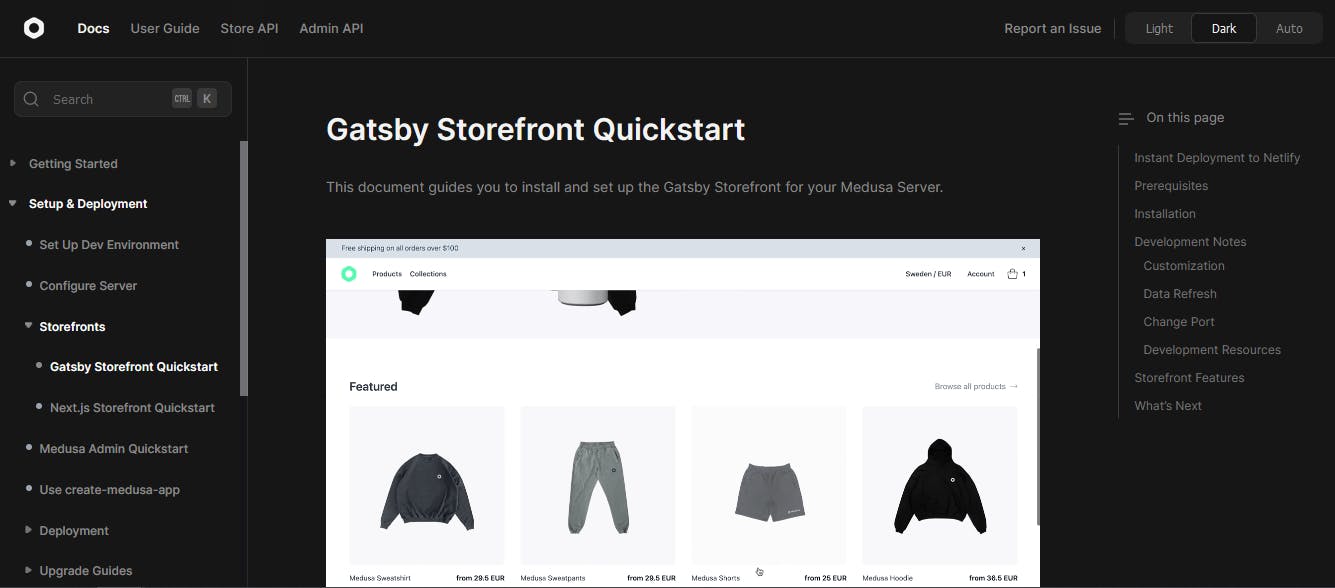
This document will walk you through installing and configuring the Gatsby Storefront on your Medusa Server Instead of manually following the guide to install and then deploying the Gatsby Storefront, you can deploy it to Netlify with this link.
You can also design your own storefront utilizing the Storefront REST APIs.
This document will walk you through the process of configuring your Medusa server in a matter of minutes.
Why Medusa is Beneficial for a Variety of Reasons
Simple to set up an eCommerce store quickly
It’s open source
Open-source Architecture
It’s payment solutions
Easy to add third-party integrations
Outstanding for any customization
Multi-store Management
Open-source e-commerce platform for markets with multiple vendors.
The headless architecture and plugin system of Medusa allows developers to choose which services to use in their e-commerce store.
The New Commercial Era is the Headless Platform
Since e-commerce has become a major channel for many companies, there has been a severe rivalry in the market, which has increased the demand for customized solutions to provide distinctive shopping experiences.
This is something Medusa is addressing by providing infrastructure that is preconfigured and optimized to run your projects.
Medusa is focusing on enabling the developer to do much more with less; this is in line with making sure that merchants can take ownership of their commerce setup as developers can help steer the direction and roadmap for your project without relying on us to create the features you need.
By creating powerful tools for developers, Medusa enables them to be more efficient and focused on their work.
Getting Started with "create-medusa-app" command
Starting a new e-commerce project has never been easier; with just one command, you can have your Medusa development environment up and running in a matter of minutes.
After finishing the setup command, you will have a Medusa backend, a Gatsby or Next.js shop, and an admin dashboard operating on your local system.
Use the following command with your favourite package manager:
create-medusa-app
By executing the command, you can simultaneously install a storefront, a Medusa admin, and a server for Medusa.
How to Create a Medusa Project
Execute the following command in your terminal:
yarn create medusa-app

OR

npx create-medusa-app
Enter the name of the directory that you wish to install the project in.
You can provide a new name that you want or leave the default value.
"my-medusa-store."
You will then be prompted to select the Medusa starter that will be used to deploy the Medusa server.
You can select the Contentful starter, the default Medusa starter, or input a starter URL by selecting Other.
? Which Medusa starter would you like to install? …
❯ medusa-starter-default
  medusa-starter-contentful
  Other
The server will be installed under the backend end directory under the project directory.
An SQLite database will be created inside that directory as well with demo data seeded into it.
More information about the Contentful starter can be found in the documentation
It's time to select the storefront starter after choosing the Medusa starter.
? Which storefront starter would you like to install?
❯ Gatsby Starter
Next.js Starter
medusa.express (Next.js)
medusa.express (Gatsby)
Gatsby Starter (Simple)
None
More information on the Next.js Storefront QuickStart and the Gatsby Storefront QuickStart may be found in the documentation.
After selecting one of the beginnings listed above, the installation of each component and any related dependencies will start.
You'll see instructions for starting each component after the installation is complete.
Your project is ready.
The available commands are:
Medusa API
cd my-medusa-store/backend
yarn start

Admin
cd my-medusa-store/admin
yarn start

Storefront
cd my-medusa-store/storefront
yarn start
The commands will differ depending on your responses to previous prompts.
The project directory will look like this
/my-medusa-store
  /storefront // Medusa storefront starter
  /backend // Medusa starter as a backend option
  /admin // Medusa admin panel
I recommend checking out this blog for a step-by-step guide on how to install the "Create Medusa App."
How to Implement Different Medusa Functionality
In the documentation, there is a section called How-to Guides that I really enjoy.
How easily they have implemented all of the documentation for a new user.
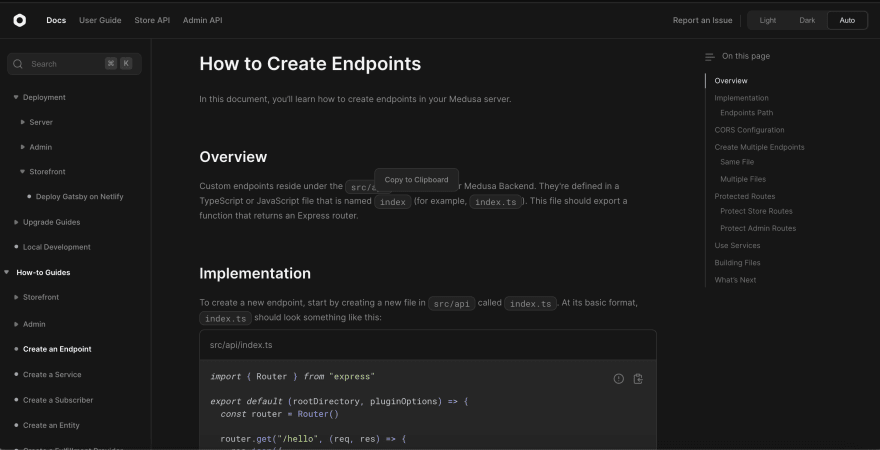
For e.g.
How to Add Cart Functionality
To enable users to purchase things, e-commerce platforms need carts. Every client, whether logged in or a guest, ought to have a cart assigned to them. The buyer can then include more items in their cart.
You can build a cart using the following code:
medusa.carts.create()
.then(({ cart }) => {
  localStorage.setItem('cart_id', cart.id);
  //assuming you have a state variable to store the cart
  setCart(cart);
});
There are no parameters required for this request. In the response, it returns the created cart.
The cart will be assigned a random region by default.
You can specify the cart's region by giving a region id option in the request body, or you can assign it a specific region during construction.
medusa.carts.create({
  region_id
})
.then(({ cart }) => {
  localStorage.setItem('cart_id', cart.id);
  //assuming you have a state variable to store the cart
  setCart(cart);
});
How to Use Different Medusa Integrations
Integrations are the most important factor to develop and sell items in any online store for e.g. Payments, Analytics, CMS, Notifications, Search, etc.

For e.g.
How to configure Stripe
Use the Stripe plugin to set up Stripe payments in your Medusa server, admin, and storefront
You can use Stripe as a payment provider for your Medusa project by following the instructions in this guide.
Shopify OR Medusa
Shopify is one of the most popular e-commerce platforms in the world. Its simplicity appeals to many merchants and enterprises who do not want to get bogged down in the technical complexities of developing an e-commerce shop and want to start selling their products as soon as possible.
Medusa, on the other hand, is an open-source headless commerce platform created with an abstraction-based architecture that allows it to be more extensible and customizable.
Medusa is designed for developers and focuses on giving an excellent developer experience through its architecture, ease of setup, supportive community, and extensive documentation. Despite being less than a year old, Medusa is already in use by merchants selling abroad.
There are a lot of benefits to Medusa over Shopify. Although Shopify has many simple features, Medusa is more configurable and adaptable.
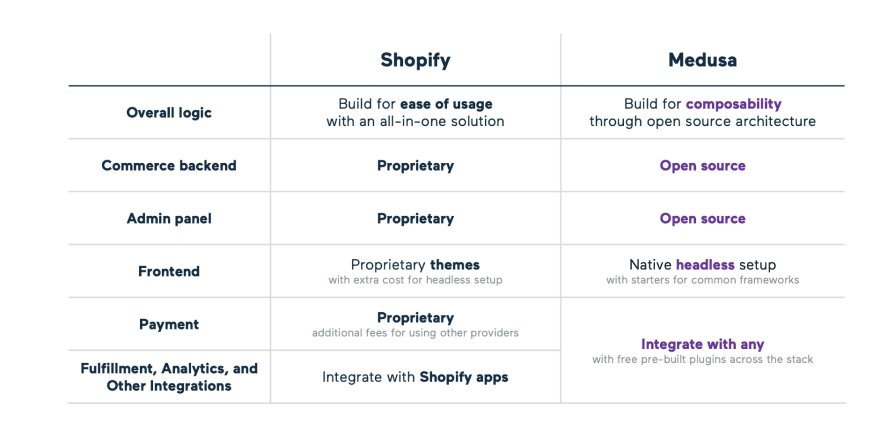
I'd like to clarify that developers are required to set up and maintain Medusa because it will be a simple task for them. As a result, Medusa would not be a good fit for your organisation if it requires a solution that does not rely on developers to run and maintain the shop.
I recommend reading this blog post for more information.
Why Should You Use Medusa?
Medusa is in essence an open-source headless commerce backend.
Its abstraction-based architecture allows for simple customization and maintenance.
Medusa has built-in flows for claims, returns, and exchange flows, allowing end-users to self-serve.
The main goal of the Medusa Admin panel is to provide a simple, lean solution.
A developer can leverage and use any frontend framework of their choice.
A developer can also use Medusa's REST APIs to create their own storefront using any framework of their choice.
The ability to choose your payment methods is a clear advantage of using Medusa. Medusa works with various payment systems right away, including Stripe, Klarna, Adyen, and PayPal. Because Medusa is open source, you can easily modify its payment API to interact with your preferred payment provider.
Medusa also includes out-of-the-box support for third-party integrations such as CMS (Contentful & Strapi), payment (e.g., Stripe, PayPal), marketing (e.g., SendGrid and S3), search (Algolia & Meilisearch), analytics (e.g., Segment), and many more.
Developers who want complete control over the codebase, integrations, and customizations of the e-commerce platform.
That was it for this blog. I hope you learned something new today.
If you did, please like/share so that it reaches others as well.
If you’re a regular reader, thank you, you’re a big part of the reason I’ve been able to share my life/career experiences with you.
Follow Medusa on Twitter for the latest updates and If you found this blog post helpful or interesting, please consider giving Medusa project a star on GitHub.
Connect with me on Twitter.
