

Table of contents
- Introduction
- Prerequisites
- We'll make use of the following tools in this tutorial
- TL;DR
- What is HarperDB
- Why should I use HarperDB?
- How to Migrate from Supabase to HarperDB
- Let’s look at the Supabase data we want to migrate
- Creating a Cloud Instance on HarperDB
- Migrating using CSV Download/Upload
- Migrating with Fastify and Harperive
- Configuring Supabase and Establishing a Fastify Connection
- Connecting to HarperDB using Harperive
- Start Migration
- Conclusion
Introduction
When building a web application, choosing the right data management tool is crucial to its success. Data management should be done right. You must employ the best tool that fits your product needs.
There are certain boxes a database must tick before you should adopt it: speed, flexibility, scalability, security, and cost.
Questions such as
Can this database solve complex enterprise data management challenges?
Can it be deployed on small devices/microprocessors, large servers, and supercomputers?
What is the community support for it like?
Answers to these questions should greatly influence your choice of database.
Supabase and HarperDB are both powerful options that developers can use to manage their data.
Supabase is an open-source alternative to Firebase, providing an easy way to add a real-time database and authentication to your app.
HarperDB is a global application platform that simplifies development with one package that includes a lightning-fast database, embedded API server, and real-time global data replication. You can deploy anywhere from cloud to edge to on-prem with a high-performance single-model data store that accommodates NoSQL and SQL.
In this post, you will learn: why HarperDB should be your go-to database, the advantages of using HarperDB, and how to migrate to HarperDB from Supabase.
Prerequisites
To follow along in this article, you will need
Node and npm
Familiarity with JavaScript and Node.js.
You must have HarperDB and Supabase accounts. (Don't worry; they have a free version)
We'll make use of the following tools in this tutorial
HarperDB - We will create a HarperDB cloud instance and use HarperDB’s Harperive Node.js driver to connect to our cloud instance.
Fastify - Fastify is an open-source Node.js framework for minimizing maintenance costs and providing the best developer experience for web applications. It prides itself on being the “fastest framework in town.” Fastify has many plugins for connecting and performing operations with different databases and services.
TL;DR
Here are the links if you want to quickly access the source code or the demo:
What is HarperDB
HarperDB is an enterprise-grade database platform designed to make it easy for developers to build and deploy applications that require data storage and management.
It is a highly scalable and flexible data platform for building various applications, from simple web apps to complex enterprise systems.
One of the critical features of HarperDB is its ability to support both structured and unstructured data, making it an excellent choice for developers who need to store and manage various data types. It also offers powerful data modelling capabilities, allowing developers to define and manage the relationships between different data entities.
HarperDB offers a variety of tools and services to help developers build and deploy applications more quickly and efficiently.
It includes tools for data migration, data integration, and analytics, as well as support for popular programming languages and development frameworks.
Why should I use HarperDB?
Most developers and product owners ask the “why” question before adopting a tool. It is a valid question to ask. Ensure that a particular tool/service meets your product needs before integrating it.
Here is why you should choose HarperDB over other databases:
HarperDB is a full-fledged data management platform. It runs anywhere and everywhere - locally, on edge, on the cloud, etc.
The cost of scaling a HarperDB database is less when compared to other databases. HarperDB requires little computing, which makes scaling less costly.
HarperDB is built on top of LMDB and is incredibly performant, usually much faster than alternatives on both read and write speeds in benchmark results.
Avoid data duplication. It is highly secure and ACID-compliant.
It offers both SQL and NoSQL solutions. You are not constrained to anything. There are no drawbacks to its NoSQL solution. You have the flexibility to pick what meets your needs.
It can perform conventional SQL operations and support schema-less data modelling and API-based execution. You can query data easily via SQL or NoSQL. Your choice!
Minimal configurations. Spend more time building the actual application.
It supports multiple plugins like Node-RED, ODBC, JDBC, etc.
You can leverage the flexibility of a NoSQL schema and the security and durability of RDBMS inside your application.
HarperDB is stateless and stable; it utilizes a single endpoint for all database operations.
Now that you have understood why HarperDB is a good choice. Let’s learn how to migrate from Supabase to HarperDB without leaving any data behind.
How to Migrate from Supabase to HarperDB
There are at least two ways to migrate to HarperDB from Supabase:
- Download your data from Supabase as CSV and then use the HarperDB REST API to carry out a bulk insert operation.
It is straightforward but can cause you to miss out on some data during migration if migration is done in real-time (while Supabase is still running). After downloading all your data as CSV on Supabase and trying to insert them into HarperDB, a user suddenly writes to the Supabase DB.
You will miss out on that data since a download already took place. This migration method will be okay if you intend to shut down operations to Supabase during the migration period. It is only sometimes the case for many applications. The second method is a better way to carry out the migration.
- Using Fastify to connect to Supabase, query data, then upload directly to HarperDB.
This is a better method as the migration can be carried out without shutting down the operation to Supabase. Suppose a new write/update into Supabase during the migration period. You can pick it up and include it in the migration without duplicating data (thanks to HarperDB’s built-in duplication removal).
You will learn to use these two methods to migrate your data to HarperDB. Before that, let’s look at the Supabase data we want to migrate.
Let’s look at the Supabase data we want to migrate
This is the Supabase data we want to migrate to HarperDB.

We have one table name bio in this database. The bio table has columns id, name, age, email, and city. It also has ten rows. We want to migrate the entire bio table to HarperDB.
Let’s sign up for HarperDB and create a cloud instance.
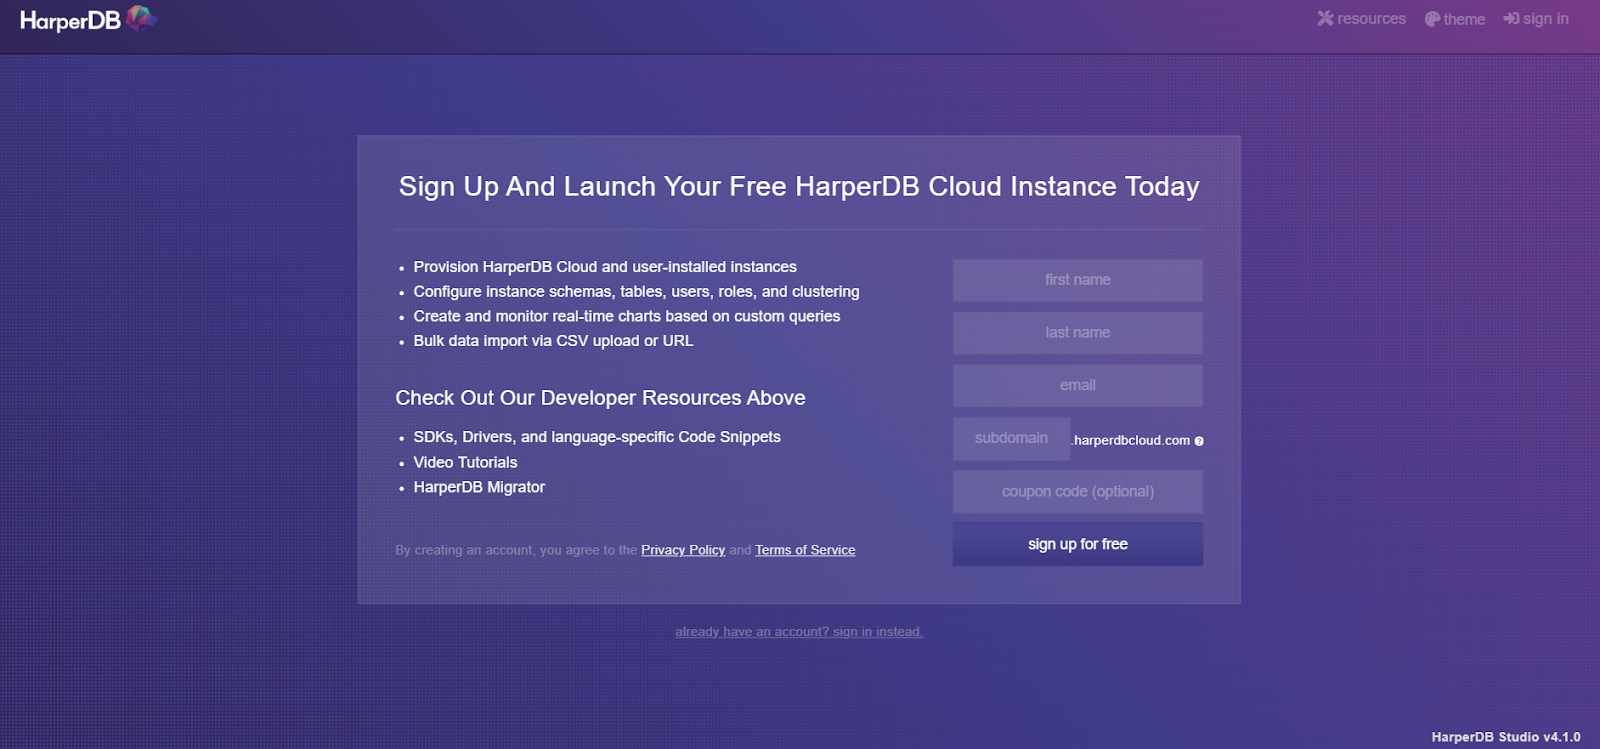
Creating a Cloud Instance on HarperDB
- Sign up on HarperDB and fill in the necessary information. The subdomain field will be the URL of your cloud instance.
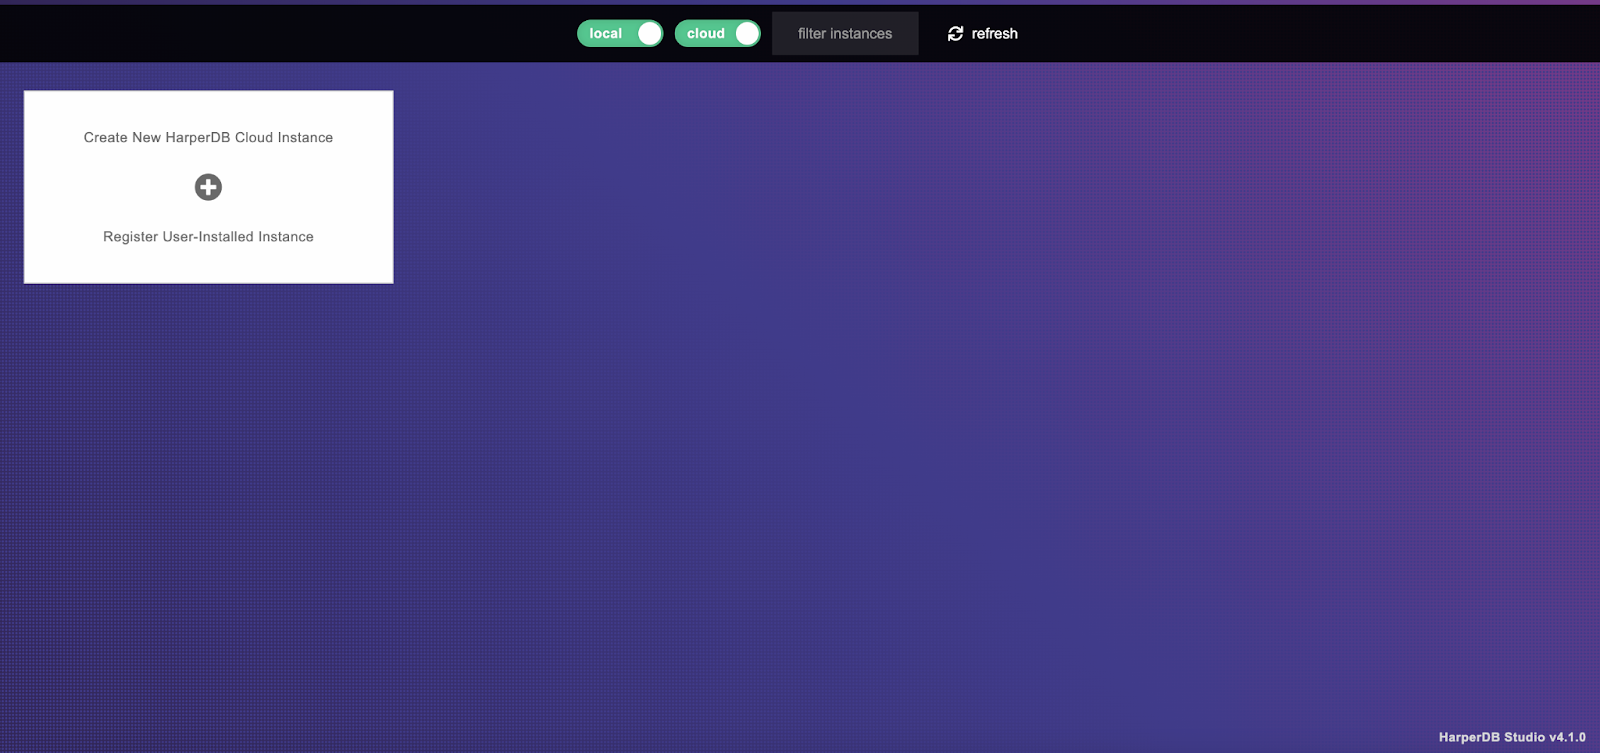
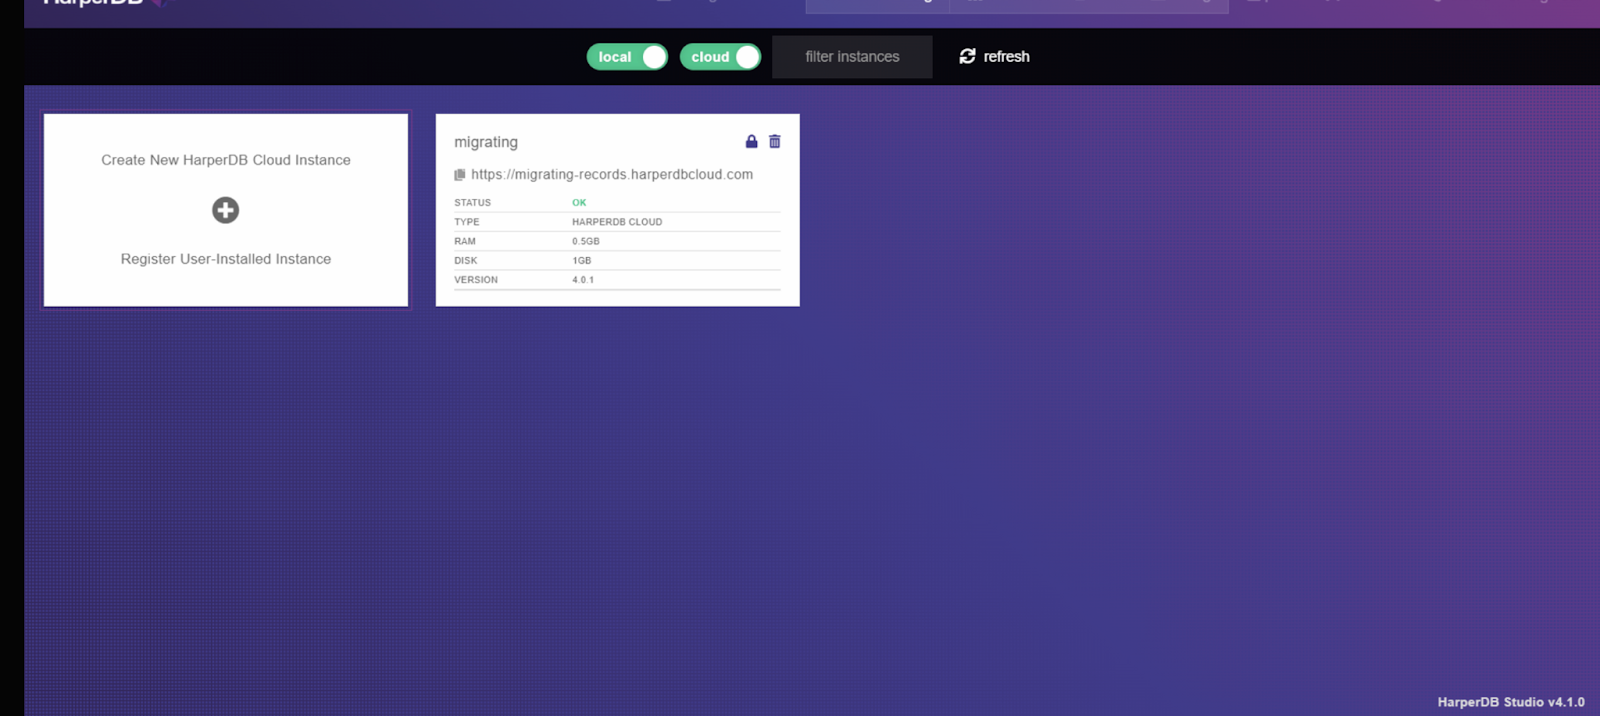
2. Create a new HarperDB cloud instance
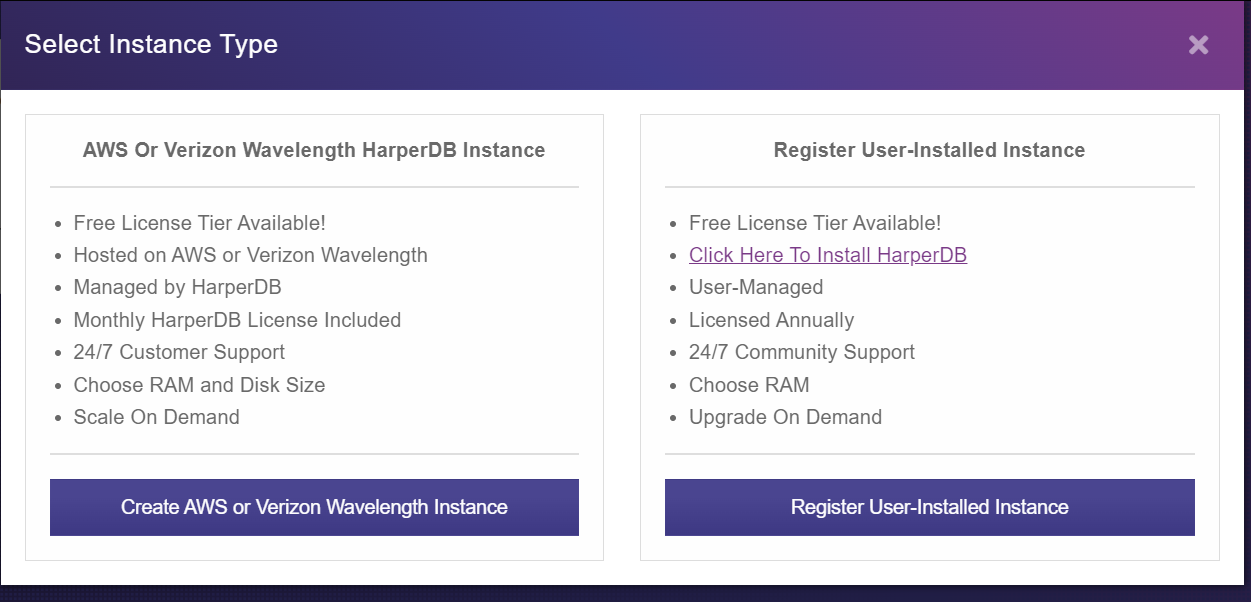
3. Select an instance type. Select Create AWS or Verizon Wavelength Instance to create an instance hosted on AWS.
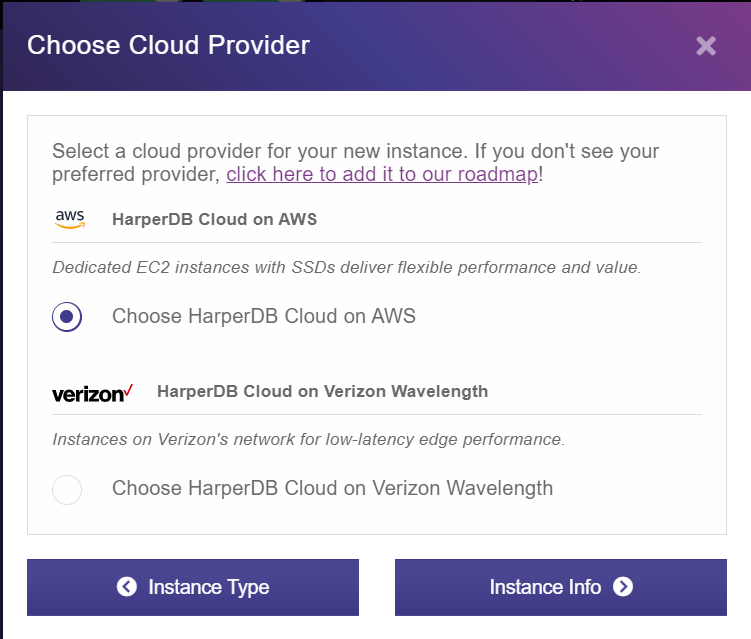
4. Choose a cloud provider. Select Choose HarperDB Cloud on AWS
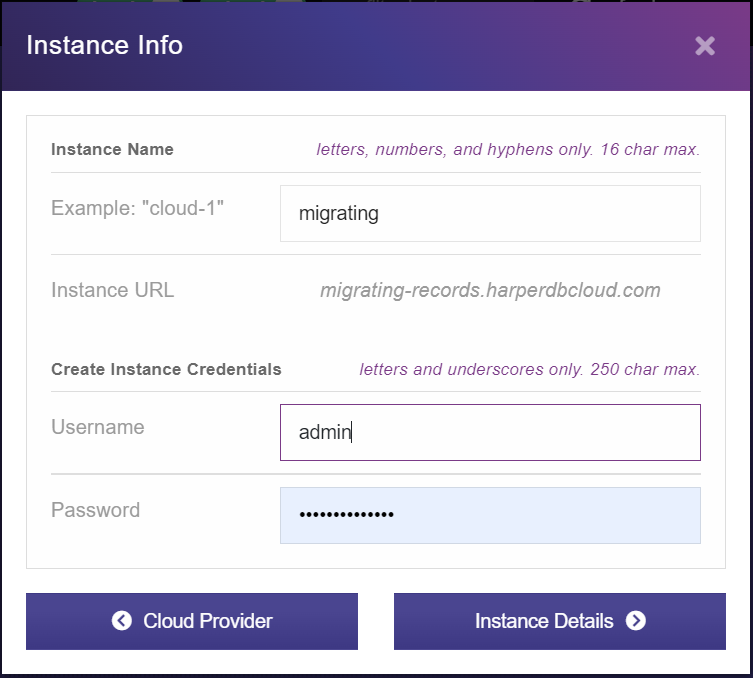
5. Fill in the instance info. Here, we gave it the name migrating. Also, create credentials for your instance.
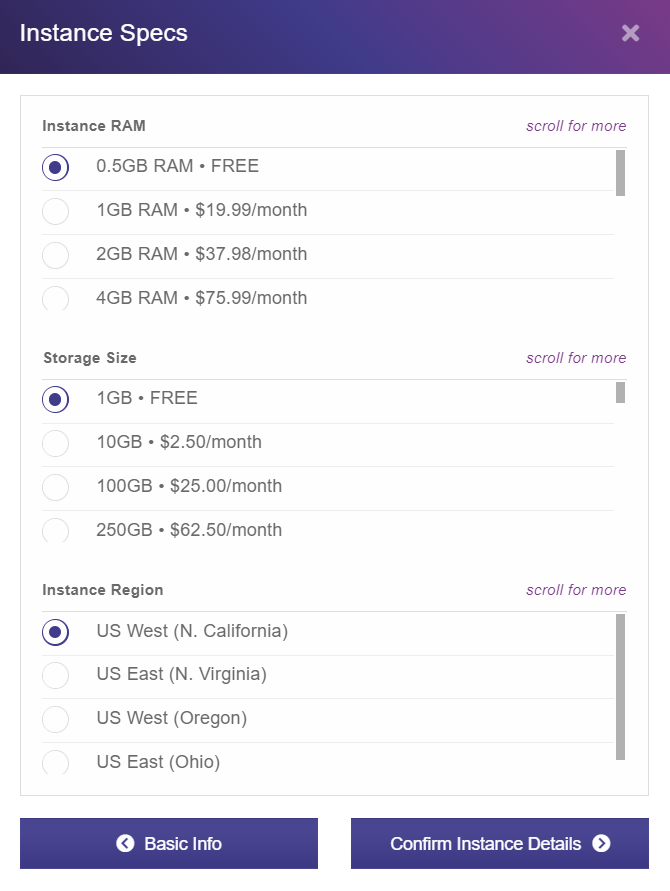
6. Select the RAM, Size, and Region that fits your needs. You can always upgrade at any time.
7. Confirm instance details, and you are good to go.

Wait for HarperDB to create a cloud instance for you. This will take a moment. You will get an e-mail notification when your HarperDB cloud is ready.
8. Let’s create a Schema called UserData. You can give it whatever name you want. We also need to create a table.
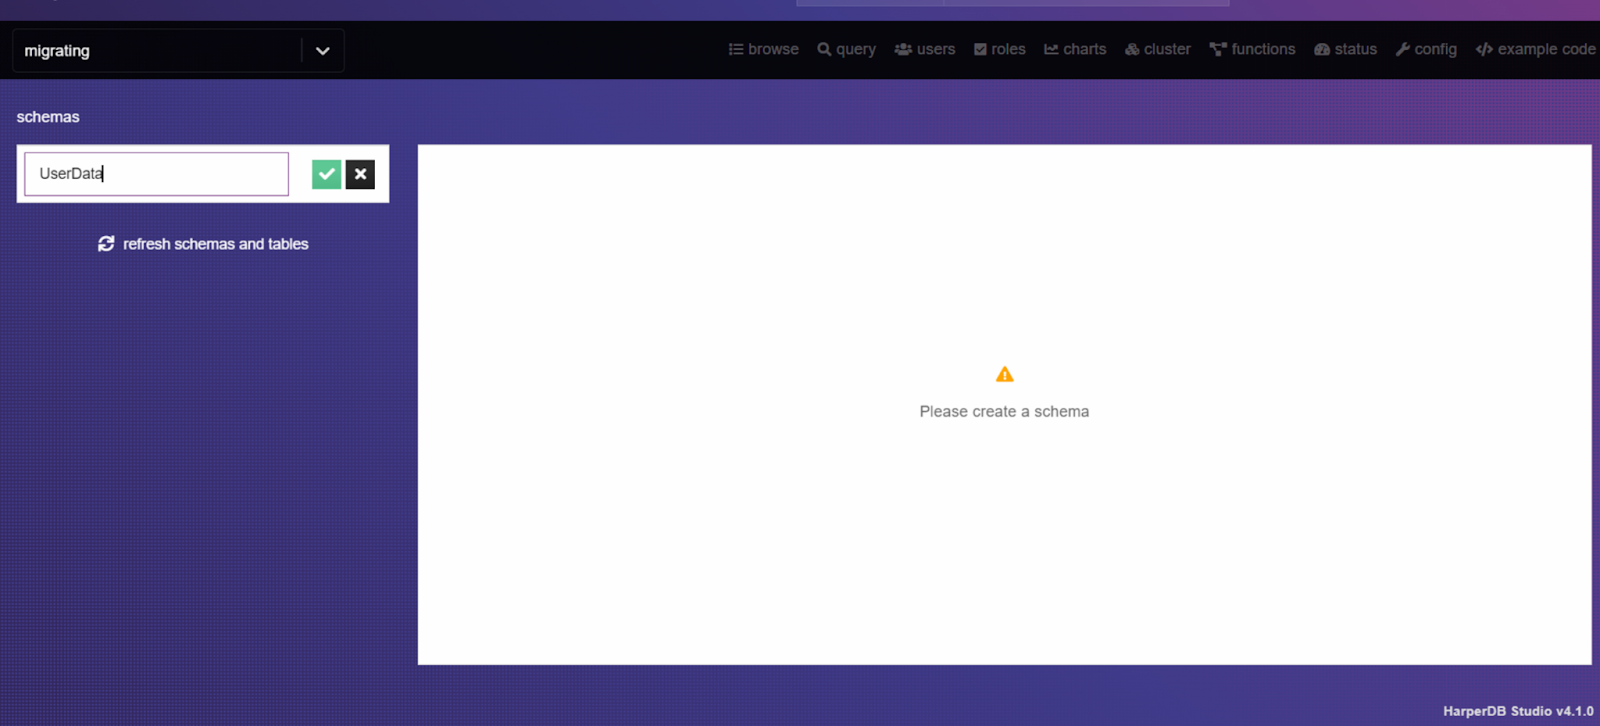
9. Let’s call our table name bio and give it a hash attribute of id. Select the green checkmark to create.

Now that we have set up our cloud instance on HarperDB let’s migrate from Supabase to HarperDB using CSV bulk upload.
Migrating using CSV Download/Upload
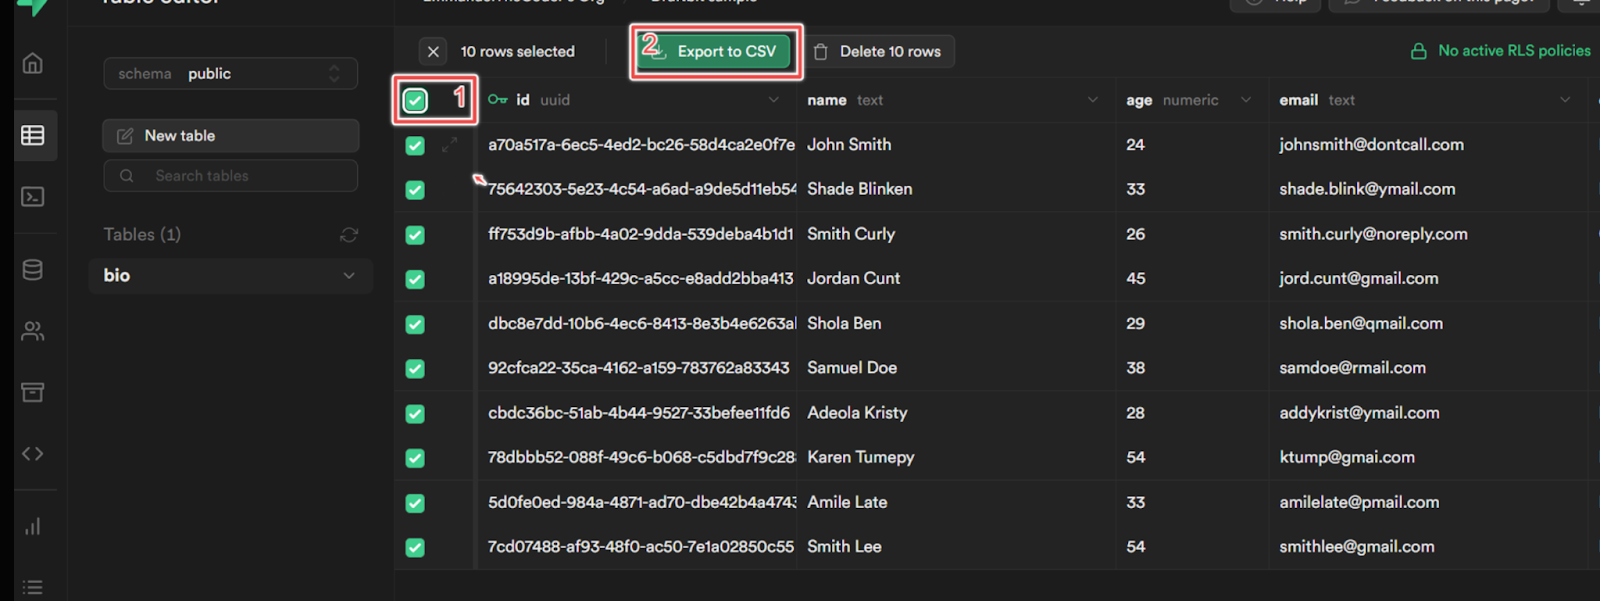
- Let’s go over and download our Supabase database as CSV. Go to the Supabase table editor, click on the table you want to migrate, select all rows, and click Export to CSV. It downloads your table as CSV.
Let’s go over to HarperDB and import our CSV download. First, export your database as CSV on Supabase.
- You can import the CSV file directly from the HarperDB dashboard or using the REST API. To use the dashboard method, go to your dashboard and click on the document icon at the top right of your computer screen.
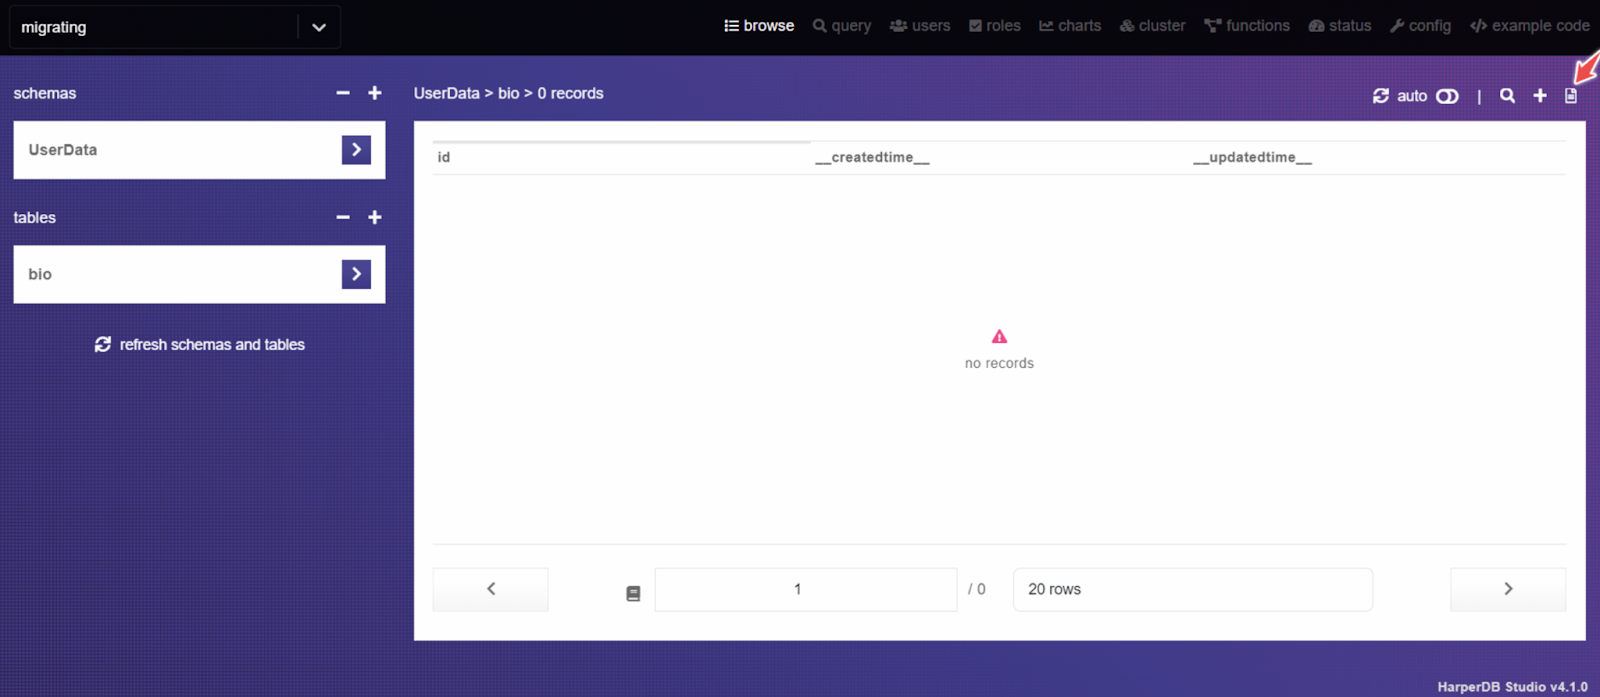
- Follow the instructions to complete the import.

- Alternatively, you can use the REST API method.
curl --location --request POST 'http://localhost:9925' --header 'Content-Type: application/json' --data-raw '{ "operation": "csv_url_load", "schema": "UserData", "table": "bio", "csv_url": "https://s3.amazonaws.com/complimentarydata/breeds.csv" }'
The API takes the operation type, schema, table, and csv_url. If you do not have a csv_url, you can upload directly from your computer using the CSV File Load endpoint this way:
curl --location --request POST 'http://localhost:9925' \
--header 'Content-Type: application/json' \
--data-raw '{
    "operation": "csv_file_load",
    "action": "insert",
    "schema": "UserData",
    "table": "bio",
    "file_path": "/home/user/imports/bio.csv",
    "transact_to_cluster": true
}'
Your data has been successfully uploaded to your HarperDB cloud instance.
Earlier, you learned that this method is not ideal if you intend to migrate on the fly, because any data written into Supabase after the CSV download will not be captured in the migration. Let’s learn a better approach; how to migrate on the fly using Fastify.
Migrating with Fastify and Harperive
Create a folder and initialise it with the following command:
mkdir migrate-db
cd migrate-db
npm init -y
Supabase is a database built on top of PostgreSQL, so we can use the @fastify/postgres plugin to establish a connection with Supabase and then query for all the data in a particular table. Sounds good, but there is a better way. In the Fastify ecosystem, several plugins are built by members of the Fastify community. fastify-supabase is one of those community plugins. It allows you to connect with Supabase using Fastify and carry out operations seamlessly. This plugin is what we will use in this tutorial.
Let’s install harperive, the HarperDB Node.js drive, fastify-supabse, and dotenv for storing our application secrets.
npm install harperive fastify-supabase dotenv --save
We need to configure HarperDB and Supabase inside our project and set up a Fastify connection.
Configuring Supabase and Establishing a Fastify Connection
Create an app.js file inside your project and add the following code to set up a connection with Supabase and start a Fastify server.
const fastify = require('fastify')({ logger: true });
require('dotenv').config()

fastify.register(require('fastify-supabase'), {
  supabaseKey: process.env.SUPABASE_KEY,
  supabaseUrl: process.env.SUPABASE_URL
})

fastify.listen({port: 3000}, (err) => {
  if (err) {
    fastify.log.error(err)
    process.exit(1)
  }
})
Add the SUPABASE_KEY and SUPABASE_URL to your .env file. To get your Supabase key and URL, go to Project Settings ⇒ API inside your Supabase dashboard.
Now that we have Supabase and Fastify set up let’s also set up a connection to HarperDB using the Harperive Node.js driver.
Connecting to HarperDB using Harperive
app.js
const harperive = require('harperive');

const DB_CONFIG = {
  harperHost: process.env.DB_HOST,
  username: process.env.DB_USERNAME,
  password: process.env.DB_PASSWORD,
  //token: process.env.OPERATION_TOKEN, => you can use a token instead of a username/password
  schema: process.env.DB_SCHEMA,
}

const Client = harperive.Client;
const client = new Client(DB_CONFIG);
Add the variables to your .env file with the right values. harperHost is the sub-domain you created while setting up your HarperDB cloud instance. You can use a token in place of a username and password if you want. Schema is the schema you create inside your cloud instance.
Now, let’s migrate our data to HarperDB.
Start Migration
app.js
fastify.get('/migrate', async (request, reply) => {
  const { supabase } = fastify
  const { data, error } = await supabase.from('bio').select('*')
  try {
    const uploadBio = await client.insert({
        table: 'bio',
        records: data,
    })
    console.log("bio successfully migrated", uploadBio)
  }catch (error){
    console.log("an error occured", error)
  }
})
We queried all the data from Supabase and then inserted it inside HarperDB. If you navigate to http://localhost:3000/migrate inside your browser, the migration will take place. All the data from the bio table on Supabase will be migrated to HarperDB.
You have successfully migrated to HarperDB 🙌👏
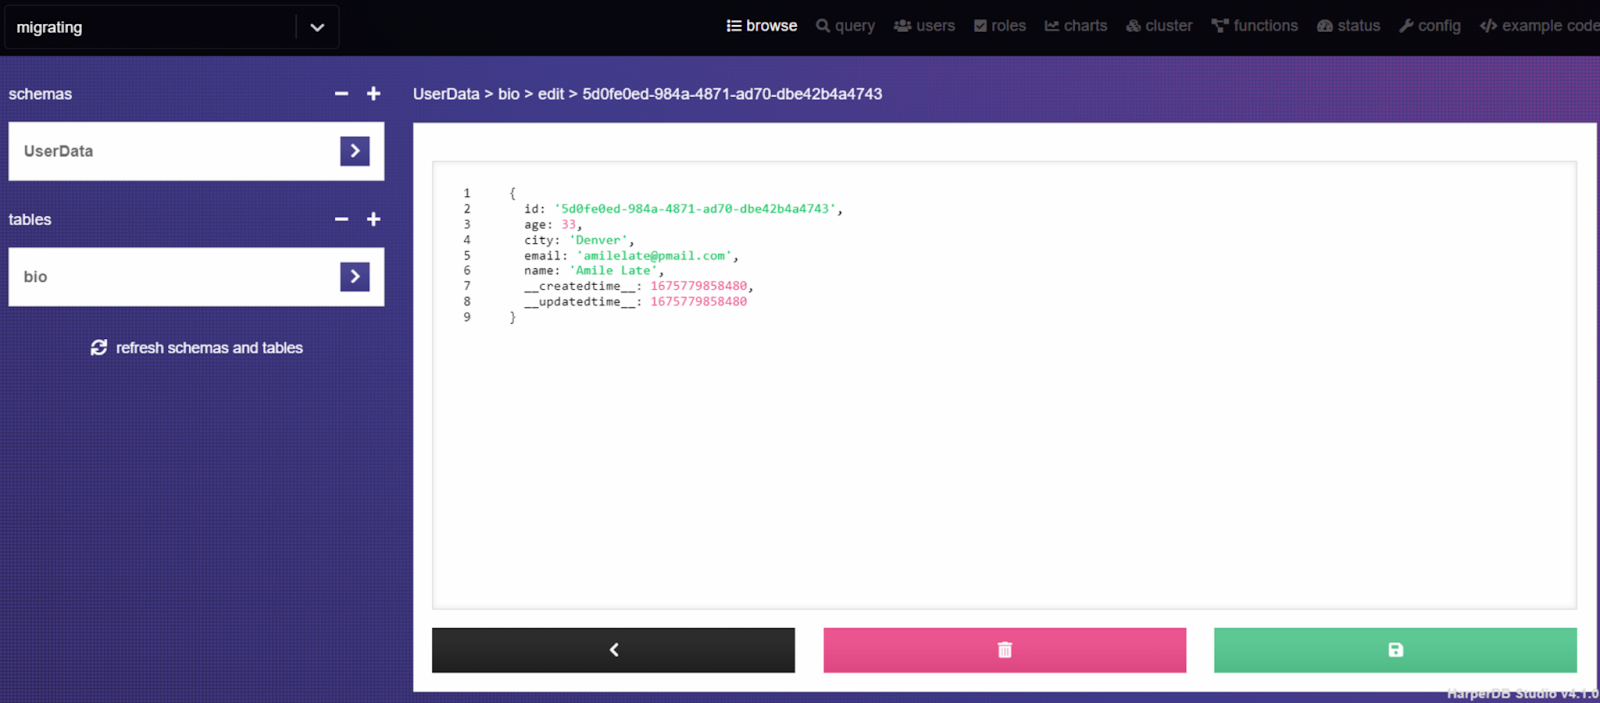
This is what our HarperDB cloud instance now looks like, and data from Supabase has populated it.

You can click on any data to view it in edit mode.
Conclusion
In this article, you learned why HarperDB is a better database and how to migrate from Supabase to HarperDB. Here is a quick recap of the things covered in this article.
HarperDB is a full-fledged data management platform. It runs anywhere, and the cost of scaling it is less since it requires little computing.
Its SQL and NoSQL capabilities allow you to do things your way. You are not constrained to the data type it can store. It supports both structured and unstructured data.
Migrating to HarperDB can improve your application’s speed, scalability, security, and performance.
Fastify is an excellent tool for migrating your application from Supabase to HarperDB. It is fast, efficient, and resilient.
In addition, if you found this blog post useful, please share it with your friends and colleagues who might also benefit from it. Your support helps me to continue creating valuable content for the tech community.
Now it's time to take the next step by subscribing to my newsletter and following me on Twitter.